
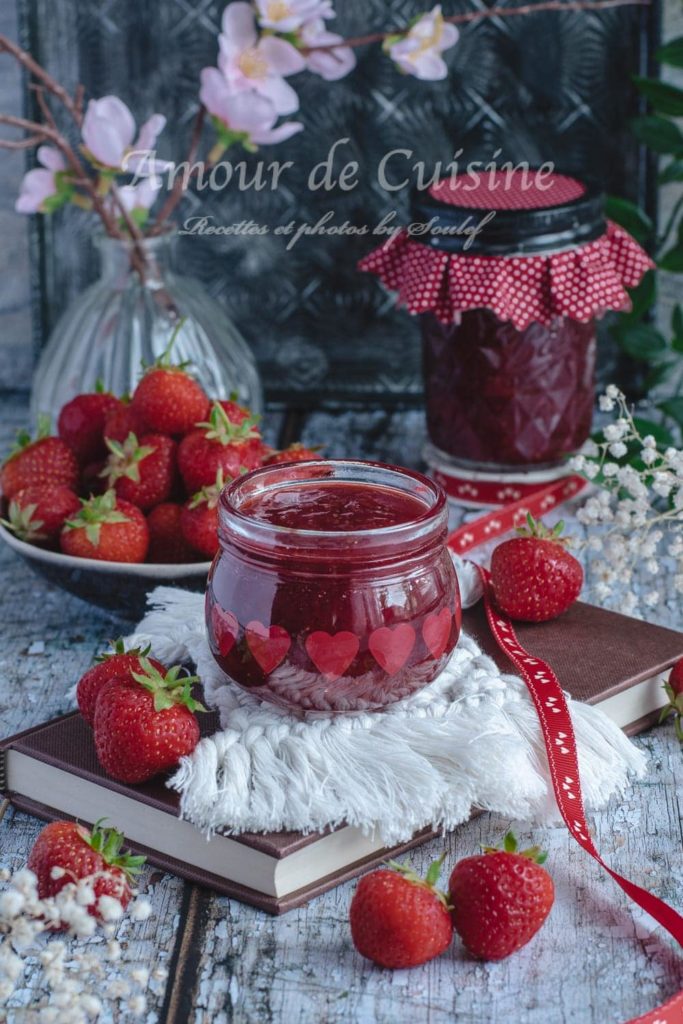
Homemade Strawberry Jam Recipe (No Pectin)
Make delicious homemade strawberry jam without pectin using this easy recipe!
With just fresh strawberries, sugar, and lemon juice, you’ll create a naturally sweet, flavorful spread perfect for toast, desserts, and more.
Enjoy the rich taste of real fruit in every bite with this simple, preservative-free jam that’s bursting with freshness.
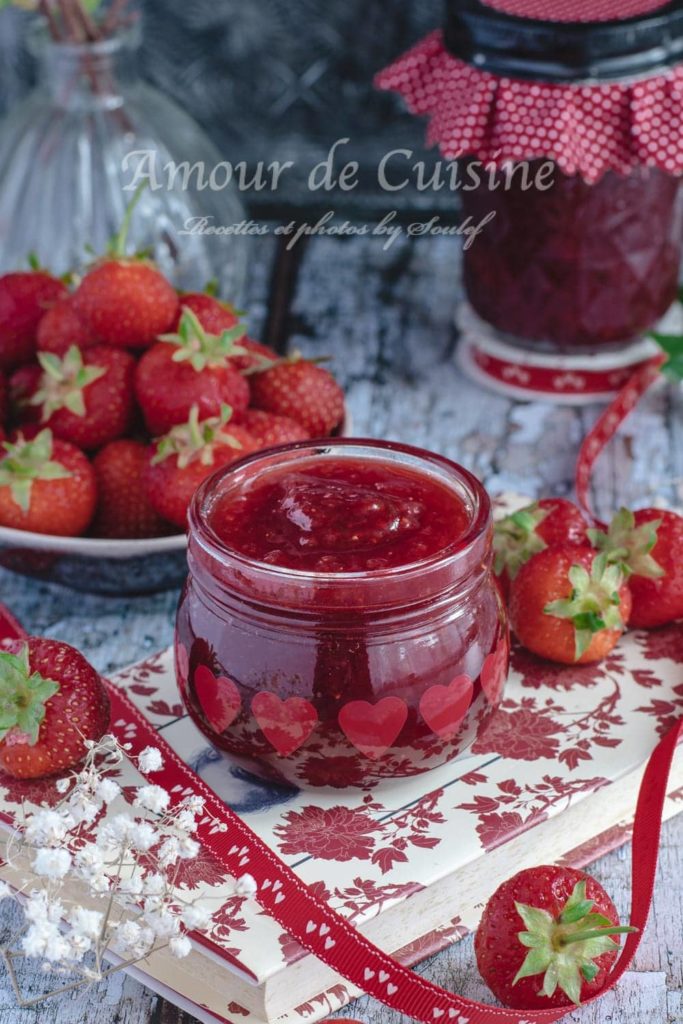
Easy Strawberry Jam Recipe with no pectin
Got a batch of sweet, ripe strawberries? It’s the perfect time to make a simple, homemade strawberry jam bursting with fresh flavor!
This traditional recipe—passed down from my mother—is incredibly easy, using only strawberries, sugar, and a touch of lemon.
No preservatives, no artificial ingredients—just pure, homemade goodness.
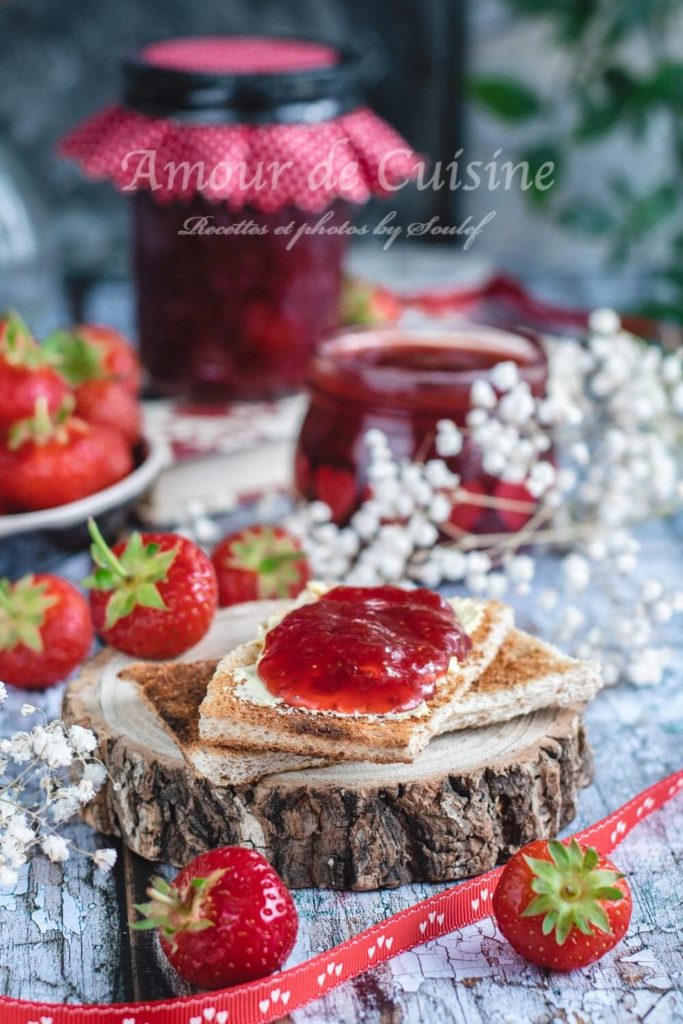
There’s nothing quite like homemade jam. It’s smoother, fresher, and so much better than store-bought versions.
In our home, it never lasted long! A thick slice of toasted homemade bread, a smear of fresh butter, and a generous dollop of jam—it was the ultimate treat.
How to Make the Perfect Strawberry Jam
The secret to my mother’s jam is a simple ratio: one part fruit to half a part sugar.
Here’s how to do it:
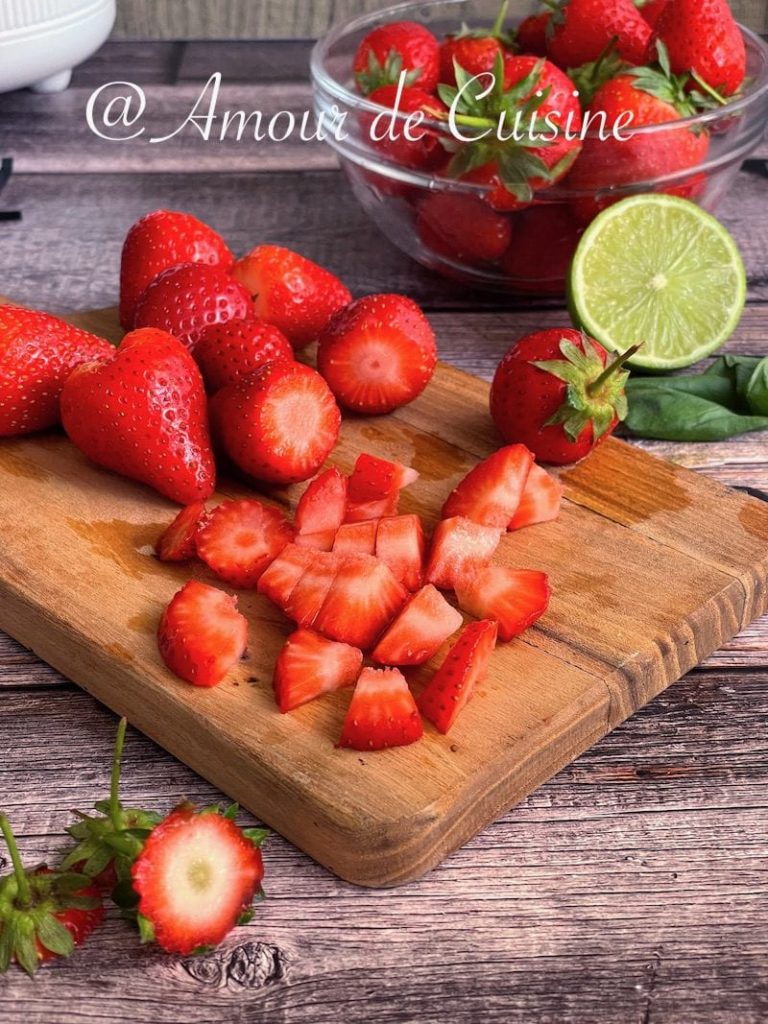
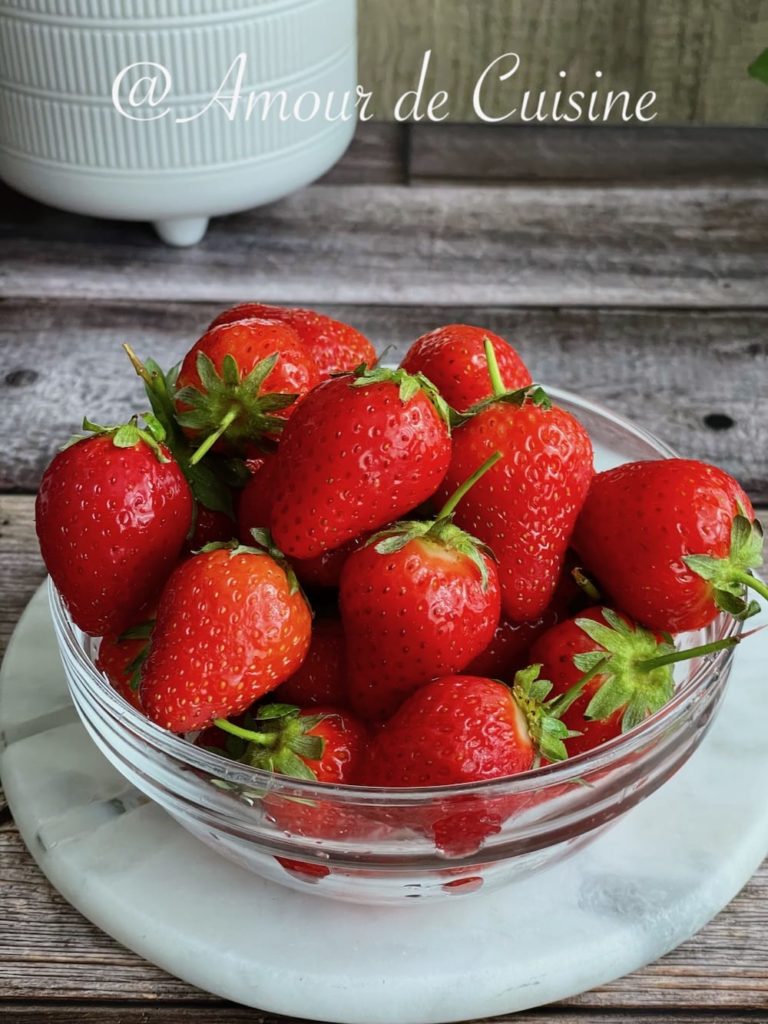
- Wash the strawberries – Soak them in a large bowl of fresh water to remove dirt and impurities. Let the debris settle at the bottom, then scoop the strawberries out with a skimmer.
- Prep the fruit – Cut the strawberries into quarters (or smaller if they’re large).
- Measure – Use a cup to measure the amount of strawberries. For every 6 cups of strawberries, add 3 cups of sugar.
- Cook – Simmer over low heat, stirring occasionally, until the jam reaches the perfect consistency.
Ingredients for traditional homemade strawberry jam
– 950g Strawberries (7 cups, cleaned and quartered) : Fresh, ripe strawberries provide the best flavor. Cleaning and cutting them into quarters helps release their juices and cook evenly.
450g Sugar (3.5 cups) : Sugar not only sweetens the jam but also helps it thicken naturally by drawing out the fruit’s moisture and acting as a preservative.
Juice of 1 Whole Lemon : Lemon juice enhances the flavor, balances the sweetness, and provides natural pectin to help the jam set beautifully.
Step-by-Step How to Make Traditional Homemade Strawberry Jam
Prepare the Strawberries
- Wash the strawberries thoroughly and remove any stems.
- Chop them into small pieces for quicker cooking and a smoother texture.
Macerate the Fruit
- In a large, heavy-bottomed saucepan, combine the chopped strawberries, sugar, and fresh lemon juice.
- Use a potato masher to lightly crush the strawberries. This helps release their juices and blend the flavors.
- Cover and let the mixture macerate for at least 2 hours in a cool place. This step allows the sugar to dissolve and the flavors to develop.
- Pro Tip: I prefer to let it sit overnight and cook the jam the next day for the best taste!
Start Cooking the Jam
- Place the saucepan over medium heat and bring the mixture to a boil, stirring occasionally.
- As it cooks, stir frequently to prevent sticking and to evenly distribute the heat.
Simmer and Skim
- Reduce the heat to medium-low and let the jam simmer gently.
- As foam forms on the surface, skim it off with a spoon.
- Optional: Add 1 teaspoon of butter—this helps dissolve the foam and gives the jam a glossy shine.
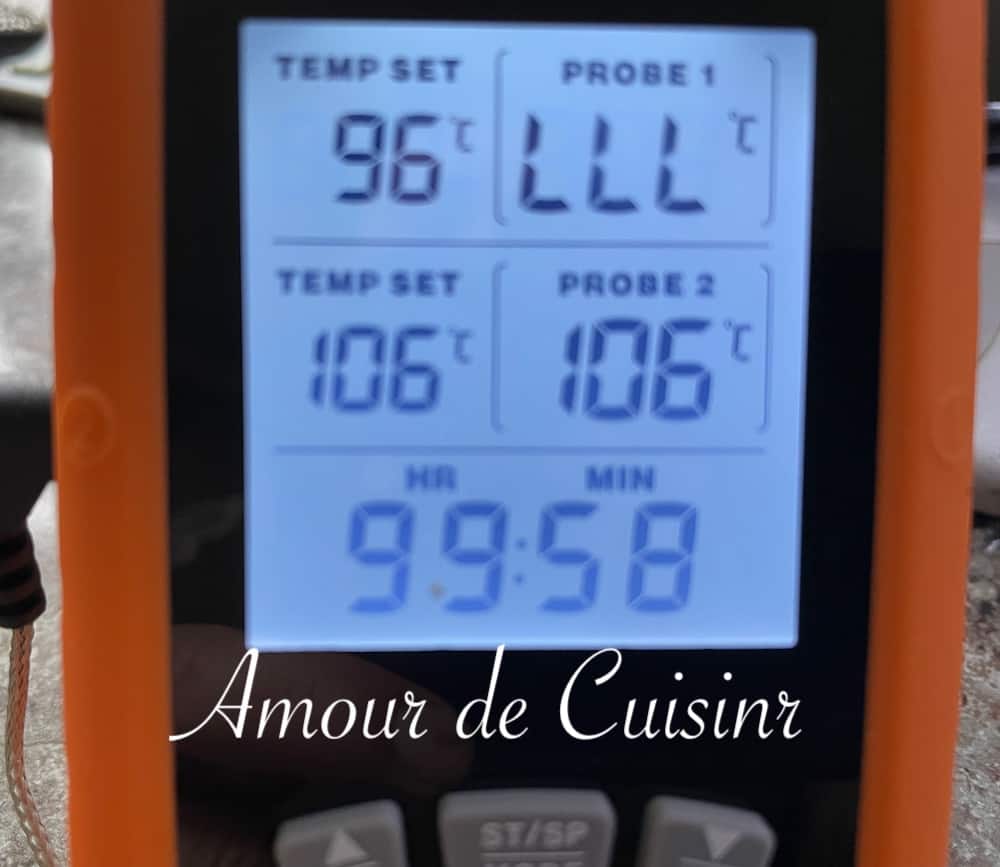
Check for Doneness
- The jam is ready when it reaches 106°C (223°F) on a probe thermometer.
- If you don’t have a thermometer, use the plate test:
- Place a small spoonful of jam on a cold plate.
- Wait a few seconds and push it with your finger. If it wrinkles and holds its shape, it’s done!
Jar and Store the Jam
- Pour the hot jam into sterilized, airtight jars, leaving a little space at the top.
- Seal the jars tightly and turn them upside down until completely cooled. This helps create a vacuum seal.
- Store in the refrigerator or at room temperature if properly sealed.
How to Check If Your Strawberry Jam Is Cooked
There are two simple ways to test if your homemade strawberry jam is ready: the cold plate test and the temperature method.
Cold Plate Test (Traditional Method)
This classic method helps determine if the jam has reached the right consistency.
Steps:
- Prepare a cold plate – Before you start making the jam, place a small plate in the freezer.
- Test the jam – Once you think the jam is ready, remove the plate from the freezer and drop a teaspoon of jam onto it.
- Let it sit for 2-3 minutes – The cold surface will quickly cool the jam, giving you a good idea of its final texture.
- Tilt the plate – Lift the plate and hold it at an angle.
- If the jam flows slowly, it’s ready.
- If it runs too quickly, it needs more cooking time.
- Repeat if necessary – If the jam is too runny, simmer it for a few more minutes and test again.
Temperature Method (Modern & Accurate)
For a precise result, use a sugar thermometer or a digital probe thermometer.
Steps:
- Place the thermometer directly in the jam while it’s cooking.
- Once the temperature reaches 106°C (223°F), the jam is perfectly set.
- Remove from heat and proceed with jarring.
Both methods work well, but using a thermometer ensures perfect consistency every time.
How Much Sugar Should You Add to Jam?
A common question I get is: Can I use less sugar in my jam?
The answer is yes, but there are a few important things to consider.
Sugar’s Role in Jam-Making
Sugar isn’t just for sweetness—it plays a crucial role in:
✔️ Thickening the jam (by helping the fruit release its natural pectin)
✔️ Preserving the jam (allowing it to last for months)
✔️ Balancing flavors (enhancing the natural fruitiness)
Can You Reduce the Sugar?
Yes, you can adjust the sugar to your taste. However, keep in mind:
- Less sugar = longer cooking time – The jam will take longer to reach the right consistency.
- Shorter shelf life – Traditional jam with the standard sugar ratio can last up to a year in sterilized jars. If you reduce the sugar, you should store the jam in the refrigerator and consume it sooner.
Using Jam Sugar (With Pectin)
If you want to reduce sugar but still achieve a thick texture, consider using jam sugar. This special sugar contains pectin, which helps the jam set faster, even with less sugar.
Ultimately, sugar levels come down to personal preference, but understanding how it affects texture and shelf life will help you make the best choice for your homemade jam.
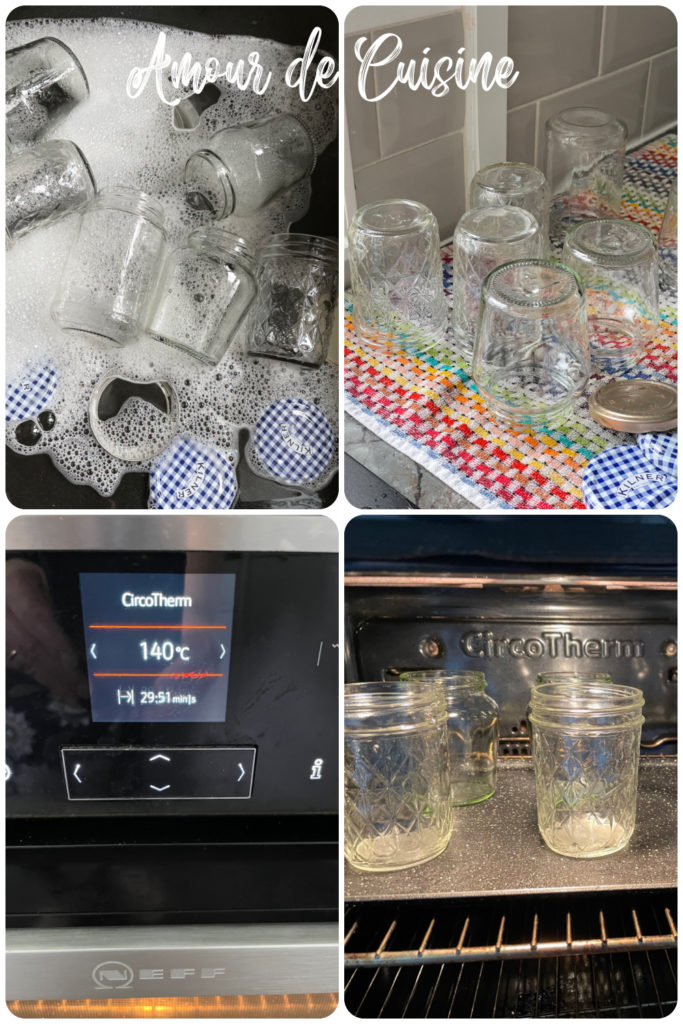
How to Sterilize Jars and Pot Homemade Jam
Properly sterilizing jars is essential for preserving homemade jam safely and ensuring it lasts for months without spoiling. Follow these simple steps to sterilize your jars and pot your jam correctly.
How to Sterilize Jars
Option 1: Boiling Water Method (Traditional & Reliable)
- Wash the jars and lids – Use hot, soapy water to remove any dirt or residue. Rinse thoroughly.
- Boil the jars – Place the jars and lids in a large pot filled with water. Make sure they are fully submerged.
- Simmer for 10 minutes – Bring the water to a boil and let the jars sterilize for at least 10 minutes.
- Dry the jars – Use sterilized tongs to remove the jars and place them upside down on a clean towel or a baking tray lined with paper towels to air dry.
Option 2: Oven Sterilization (Quick & Easy)
- Preheat your oven to 120°C (250°F).
- Wash the jars and lids with hot, soapy water and rinse well.
- Place the jars upside down on a baking tray and heat them for 15 minutes.
- Let them cool slightly before filling with jam.
Option 3: Dishwasher Sterilization (Convenient)
- Run a hot wash cycle (without detergent).
- Keep the jars warm until ready to fill them with jam.
How to Pot the Jam Properly
- Fill the Jars While Hot – Once the jam has finished cooking, carefully ladle it into the warm, sterilized jars, leaving about ½ inch (1 cm) of space at the top. This prevents overflow when sealing.
- Remove Air Bubbles – Run a clean knife or skewer around the inside of the jar to release trapped air.
- Seal Tightly – Wipe the jar rims with a damp, clean cloth, then screw the lids on firmly but not overly tight.
- Invert the Jars (Optional) – Turn the jars upside down for 5 minutes, then flip them upright. This helps create a vacuum seal.
- Let Cool Completely – Allow the jars to cool at room temperature. You may hear a “pop” as the vacuum seal forms.
- Check the Seal – Once cooled, press down on the lid. If it doesn’t move, the seal is secure. If it pops up and down, refrigerate and use the jam quickly.
Storage Tips
✔️ Store sealed jars in a cool, dark place for up to 1 year.
✔️ Once opened, refrigerate and consume within a few weeks.
By following these steps, you’ll have perfectly preserved homemade jam, ready to enjoy anytime!
FAQs About Homemade Strawberry Jam
- Can I Double This Jam Recipe?
Yes! You can double the ingredients to make a larger batch of strawberry jam. However, keep in mind that a larger quantity will take longer to cook.
Be sure to follow the doneness tests (cold plate or thermometer method) to ensure the jam reaches the right consistency.
- How Long Does Homemade Strawberry Jam Last in the Refrigerator?
Once opened, store the jam in the refrigerator and consume it within 10 to 14 days for the best flavor and freshness.
- Can I Use Frozen Strawberries?
Yes, frozen strawberries work well for this recipe. However, since they contain more water than fresh strawberries, you may need to extend the cooking time to achieve the perfect texture.
Other desserts to try
- strawberry-cupcakes-for-valentine-day
- Pastry cream-creme patissiere recipe
- French creme caramel recipe with condensed milk
- Mascarpone Whipped Cream Frosting
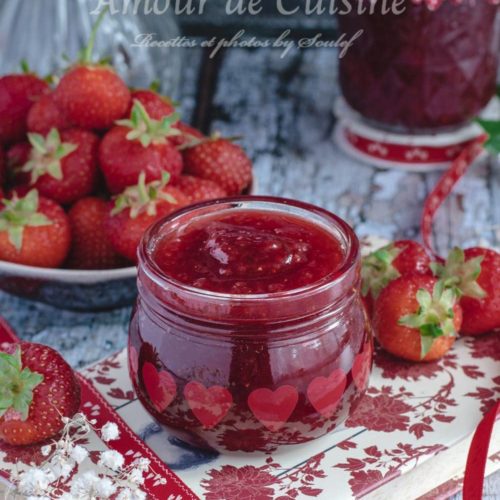
The easiest strawberry jam recipe
Ingredients
- 950 g Strawberries 7 cups, cleaned and quartered
- 450 g Sugar 3.5 cups
- Juice of 1 Whole Lemon
Instructions
- Wash the strawberries thoroughly and remove any stems.
- Chop them into small pieces for quicker cooking and a smoother texture.
- In a large, heavy-bottomed saucepan, combine the chopped strawberries, sugar, and fresh lemon juice.
- Use a potato masher to lightly crush the strawberries. This helps release their juices and blend the flavors.
- Cover and let the mixture macerate for at least 2 hours in a cool place. This step allows the sugar to dissolve and the flavors to develop.
- Pro Tip: I prefer to let it sit overnight and cook the jam the next day for the best taste!
- Place the saucepan over medium heat and bring the mixture to a boil, stirring occasionally.
- As it cooks, stir frequently to prevent sticking and to evenly distribute the heat.
- Reduce the heat to medium-low and let the jam simmer gently.
- As foam forms on the surface, skim it off with a spoon.
- Optional: Add 1 teaspoon of butter—this helps dissolve the foam and gives the jam a glossy shine.
- The jam is ready when it reaches 106°C (223°F) on a probe thermometer.
- If you don’t have a thermometer, use the plate test:
- Place a small spoonful of jam on a cold plate.
- Wait a few seconds and push it with your finger. If it wrinkles and holds its shape, it’s done!
- Pour the hot jam into sterilized, airtight jars, leaving a little space at the top.
- Seal the jars tightly and turn them upside down until completely cooled. This helps create a vacuum seal.
- Store in the refrigerator or at room temperature if properly sealed.

